
AI resources
Integrate Checkout Transparente and customize the whole experience
For online payments
Advanced integration
Without redirect
Total customization
What it offers
Customization and security
Flexibility to integrate
Payment optimization
Payment process
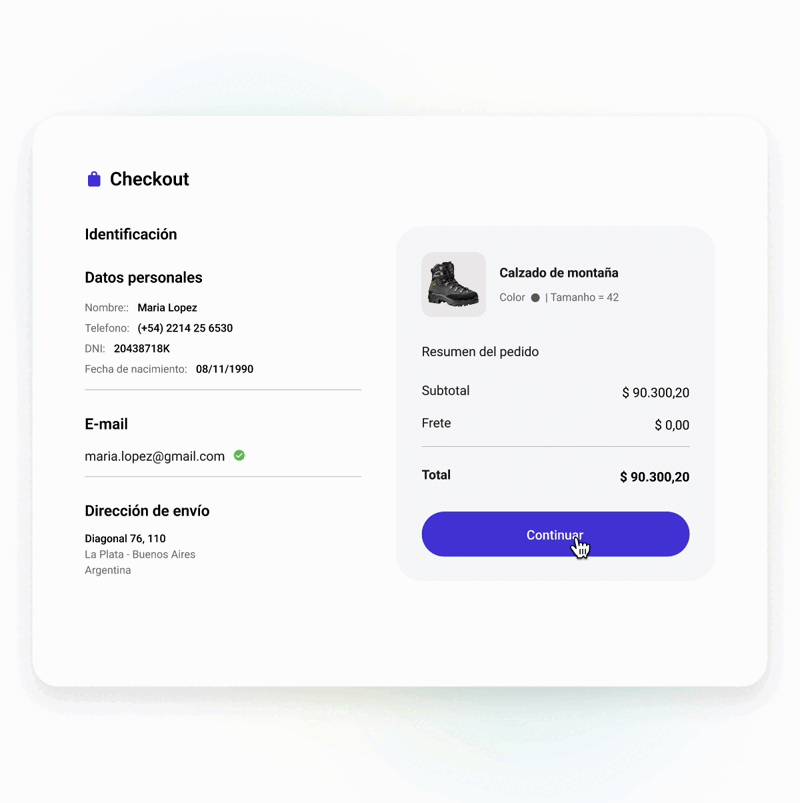
- Buyers select their preferred products or services on your website.
- Once in the payment screen, they choose one of the payment methods integrated to your checkout.
- Then, they must provide the necessary details and complete the purchase without leaving your store.
- Once Mercado Pago's APIs process the payment, the purchase is confirmed.
What sets it apart
Integration effort
Integration effort
Integration effort
Integration effort
Customization level
Customization level
Customization level
Customization level
Design ready to set up
Design ready to set up
-
Design ready to set up
Design ready to set up
Collection experience
Collection experience
On your websiteCollection experience
On your websiteCollection experience
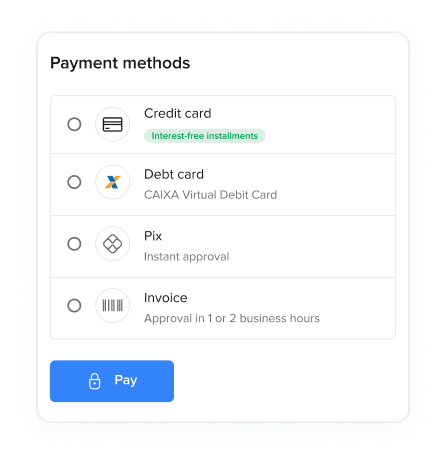
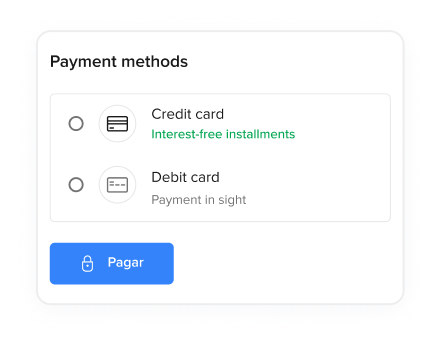
On Mercado PagoPayment methods
Payment methods
Credit card, Pix, boleto bancário and Caixa virtual debit card Payment methods
Credit card, Pix, boleto bancário, Caixa virtual debit card, Mercado Pago Wallet and Installments without Card Payment methods
Credit card, Pix, boleto bancário, Caixa virtual debit card, Mercado Pago Wallet and Installments without CardAvailability by country
Availability by country
BR
AR
MX
CL
CO
PE
UY
Availability by country
AR
BR
CL
CO
MX
PE
UY
Availability by country
AR
BR
CL
CO
MX
PE
UY
How to integrate
Previous requirements
- Mercado Pago AccountYou need to create a user on Mercado Pago or Mercado Libre to have a seller account.
- Pix keyIf you want to offer Pix payments, register Pix keys.
flowchart TD
    A[Your integrations] --> B[Create an application]
    B --> C[Configure development environment]
    C --> D[Configure payment method]
    D --> E[Configure payment notifications]
    E --> F[Test your integration]
    F --> G{Was the test successful?}
    G -- No --> H[Fix configuration] --> F
    G -- Yes --> I[Measure integration quality]
    I --> J{What do you want to do?}
    J -- Go live --> K[Go to production]
    J -- Configure another payment method --> D