Integrar con Swift
Safari View Controller integra todo Safari dentro de su aplicación usando un controlador de vista opaco. Es decir, no puede diseñarlo, no puede interactuar con él y no puede extraer ningún dato privado de él. Como resultado, SFSafariViewController puede aprovechar los datos web seguros del usuario.
En este paso vamos a instalar y configurar las dependencias necesarias para implementar SFSafariViewController en tu proyecto desarrollado en Swift.
Instalación de SFSafariViewController
Client-Side
SFSafariViewController no forma parte del UIKit por lo que, para usarlo, deberás importar Safari Services Framework que contiene los servicios necesarios para integrar comportamientos de Safari en tu aplicación iOS.
Para instalarlo, ve al archivo en donde desees utilizar Safari View Controller e importa la biblioteca SafariServices.
Main.swift
import SafariServicesAl trabajar con SFSafariViewController, puedes abrir la URL de preferencia con sólo enviar la URL o agregando algunos ajustes de configuración. A continuación, te mostramos algunos ejemplos de referencia para la implementación de SFSafariViewController.
import SwiftUI
import SafariServices
struct ContentView: View {
var body: some View {
VStack {
Button("Open Preference" ) {
if let url = URL(string:"YOUR-URL-PREFERENCE")
{
if let windowScene = UIApplication.shared.connectedScenes.first as? UIWindowScene {
if let rootViewController = windowScene.windows.first?.rootViewController {
let safariVC = SFSafariViewController(url: url)
rootViewController.present(safariVC, animated: true, completion: nil)
}
}
}
}
}
.padding()
}
}
struct ContentView_Previews: PreviewProvider {
static var previews: some View {
ContentView()
}
}
import SafariServices
import UIKit
class ViewController: UIViewController {
override func viewDidLoad() {
super.viewDidLoad()
let button = UIButton()
button.setTitle("Open Preference", for: .normal)
button.backgroundColor = .systemBlue
view.addSubview(button)
button.frame = CGRect(x: 100, y: 100, width: 200, height: 50)
button.layer.cornerRadius = 25
button.addTarget(self, action: #selector(openSafariViewController) , for: .touchDown)
}
@objc func openSafariViewController(_ sender: Any) {
if let url = URL(string: "YOUR-URL-PREFERENCE") {
let safariViewController = SFSafariViewController(url: url)
present(safariViewController, animated: true, completion: nil)
}
}
}
Cómo volver a tu App
Client-Side
Los Deep Links, también conocidos como enlaces profundos, son una forma poderosa de permitir la navegación directa a pantallas o secciones específicas de una aplicación móvil.
Crear un Deep Link
Desde nuestro checkout es posible configurar Deep Links para volver a tu aplicación, ya sea haciendo click en un link de “Volver”, o de forma automática al terminar todo un flujo de pago exitoso, para luego ser redirigido a tu App.
Para esto, debemos agregar en la creación de la preferencia de pago las propiedades back_urls y auto_return, según corresponda.
Para conocer más, puedes acceder a la documentación de URLs de retorno.
Configuración de la aplicación para la gestión del Deep Link
Client-Side
Para configurar un Deep Link nativo en iOS, dirígete al archivo <appname>/Info.plist y agrega el código que se muestra a continuación según sea tu caso.
El siguiente ejemplo aplica para un deep link de la forma iosapp://:
plain
<dict>
…
<key>CFBundleURLTypes</key>
<array>
<dict>
<key>CFBundleTypeRole</key>
<string>Editor</string>
<key>CFBundleURLName</key>
<string>your_identifier_here</string>
<key>CFBundleURLSchemes</key>
<array>
<string>iosapp</string>
</array>
</dict>
</array>
…
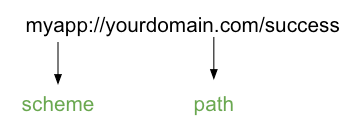
</dict>El valor CFBundleURLName corresponde al identificador de la aplicación (Identifier) y CFBundleURLSchemes al scheme utilizado en el Deep Link.
Configurar el Deep Link desde Xcode
También puedes configurar el Deep Link desde Xcode. Para esto, ubícate en la información de tu proyecto y agrega una nueva URL Type.
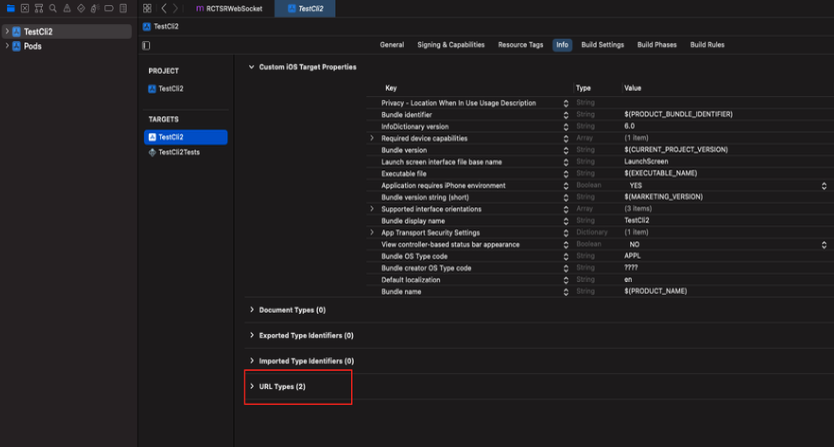
Luego, ingresa el identifier de tu aplicación y la URL Schemes del Deep Link.
Esto generará automáticamente el mismo código que se indicó anteriormente en el archivo <appname>/Info.plist.
Recepción y gestión del Deep Link
Client-Side
En iOS, cuando un deep link intenta redirigir al usuario a la aplicación desde una Safari View Controller es necesario configurar un manejador de este evento para cerrarla y cargar la vista o escena que corresponda.
struct ContentView: View {
@State private var showSuccessView = false
var body: some View {
VStack {
Text("SwiftUI")
.font(.system(size: 36, design: .rounded).weight(.bold)).foregroundColor(.black).padding(.bottom, 8)
Text("POC")
.font(.system(size: 24, design: .rounded)).foregroundColor(.gray).padding(.bottom)
Button("Abrir Safari") {
if let url = URL(string: "YOUR-URL-PREFERENCE") {
UIApplication.shared.windows.first?.rootViewController?.present(UIHostingController(rootView: SafariView(url: url)), animated: true, completion: nil)
}
}.padding(.bottom)
Button("Abrir Congrat") {
showSuccessView = true
}
}
.sheet(isPresented: $showSuccessView) {
SuccessView(isPresented: $showSuccessView)
}
// Aquí la recepción deep link
.onOpenURL { url in
if let components = URLComponents(url: url, resolvingAgainstBaseURL: false),
components.scheme == "iosapp",
components.host == "congrat",
components.path.contains("success") {
DispatchQueue.main.asyncAfter(deadline: .now() + 0.1) {
if let presenting = UIApplication.shared.windows.first?.rootViewController?.presentedViewController {
presenting.dismiss(animated: true, completion: nil)
showSuccessView = true
}
}
}
}
.padding()
}
}
struct ContentView_Previews: PreviewProvider {
static var previews: some View {
ContentView()
}
}
Desde el AppDelegate.swift o SceneDelegate.swift según sea tu caso, recibirás un Deep Link de la forma iosapp://congrat/success. Luego debéras cerrar Safari View Controller para cargar una vista llamada SuccessViewController.
import UIKit
class SceneDelegate: UIResponder, UIWindowSceneDelegate {
var window: UIWindow?
func scene(_ scene: UIScene, willConnectTo session: UISceneSession, options connectionOptions: UIScene.ConnectionOptions) {
guard let _ = (scene as? UIWindowScene) else { return }
}
func scene(_ scene: UIScene, openURLContexts URLContexts: Set<UIOpenURLContext>) {
if let urlContext = URLContexts.first {
let url = urlContext.url
if let components = URLComponents(url: url, resolvingAgainstBaseURL: false),
components.scheme == "iosapp",
components.host == "congrat",
components.path.contains("success") {
if let rootViewController = window?.rootViewController {
let successViewController = SuccessViewController {
rootViewController.dismiss(animated: true, completion: nil)
}
if let presentingViewController = rootViewController.presentedViewController {
presentingViewController.dismiss(animated: true) {
rootViewController.present(successViewController, animated: true, completion: nil)
}
} else {
rootViewController.present(successViewController, animated: true, completion: nil)
}
}
}
}
}
}
Desde el ContentView de la aplicación recibirás un Deep Link de la forma iosapp://congrat/success y, luego de un intervalo de tiempo, deberás cerrar Safari View Controller para cargar una vista llamada SuccessView.